3.4. Assigning access rights to users
Let’s say John Doe’s wife also want to have a remote control client on her smartphone. As a project owner, John Doe assigns the Administrator role to Owner, i.e., to himself, and the User role to a user associated with his wife.
At this point, we have a user called Owner in the domain and we’ll create another user, Alison, for the owner’s wife. Then we’ll assign them various levels of access rights for the service.
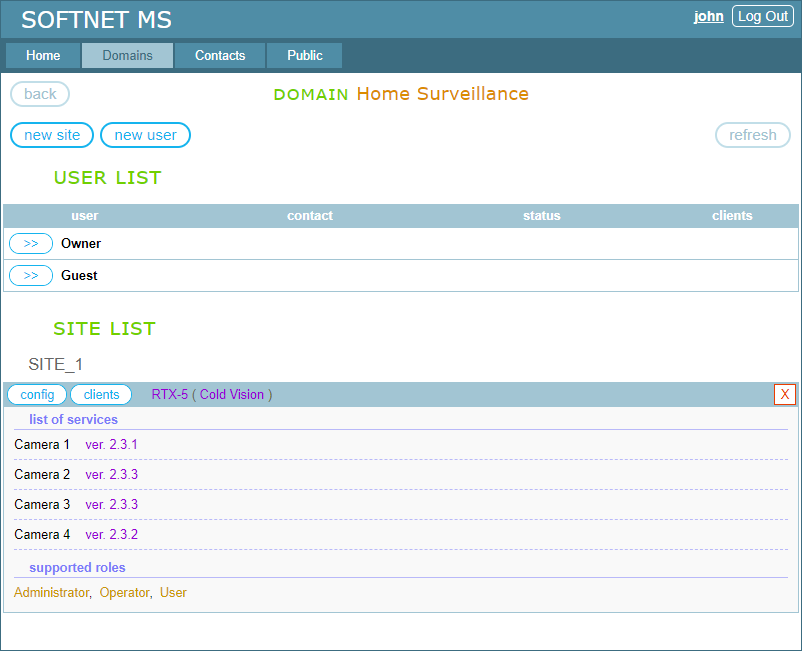
Let’s create a new user, Alison. First, we go to the domain page by clicking the domain name “Home Surveillance” at the top left of the panel:
Here is the view of our domain page:
Clicking the “new user” button takes us to the “New User” page:
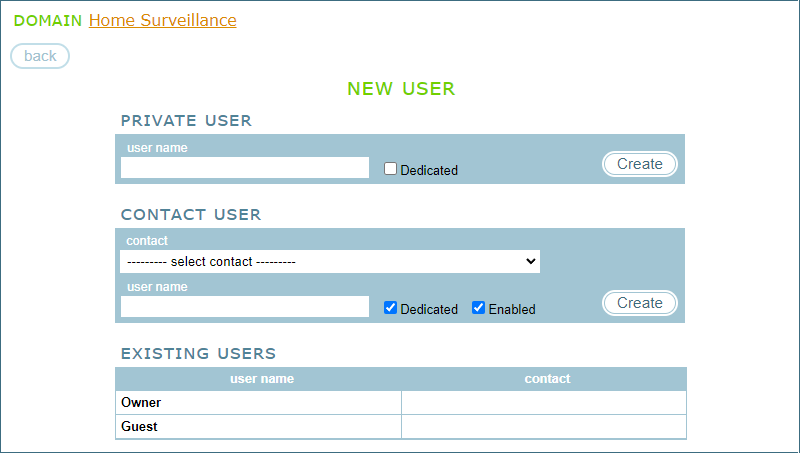
Here, we can create a Private user or a Contact user. Chapter 8 demonstrates how to share your devices with other persons and organizations via Contact users. This is a more convenient way to share devices. However, in this example, we’ll create a Private user associated with an imaginary family member.
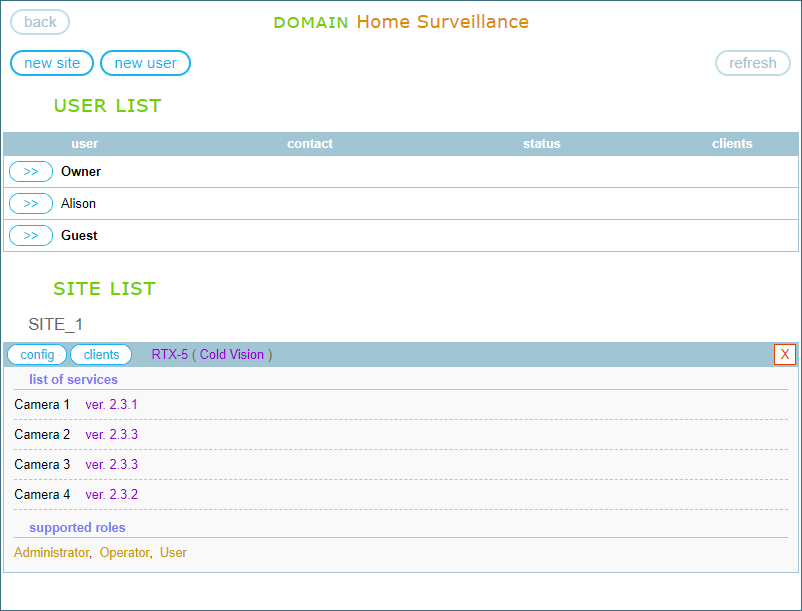
We type the name “Alison” in the “user name” field of “PRIVATE USER”, leave the “Dedicated” checkbox unchecked and click “Create”. Now in the section “USER LIST” of the domain page, the user Alison appeared:
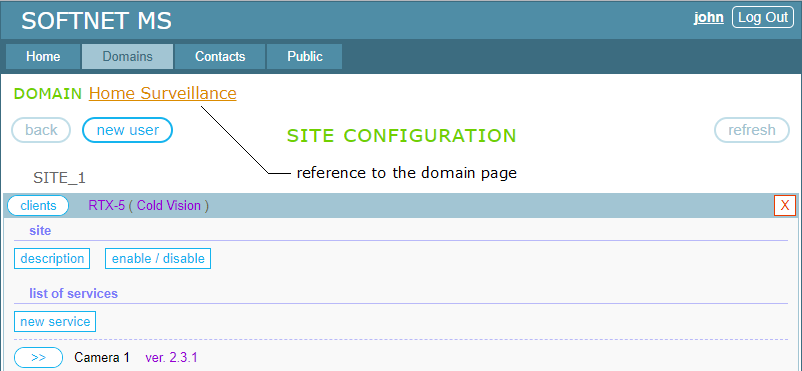
Then we go to the site configuration page by clicking the “config” button:
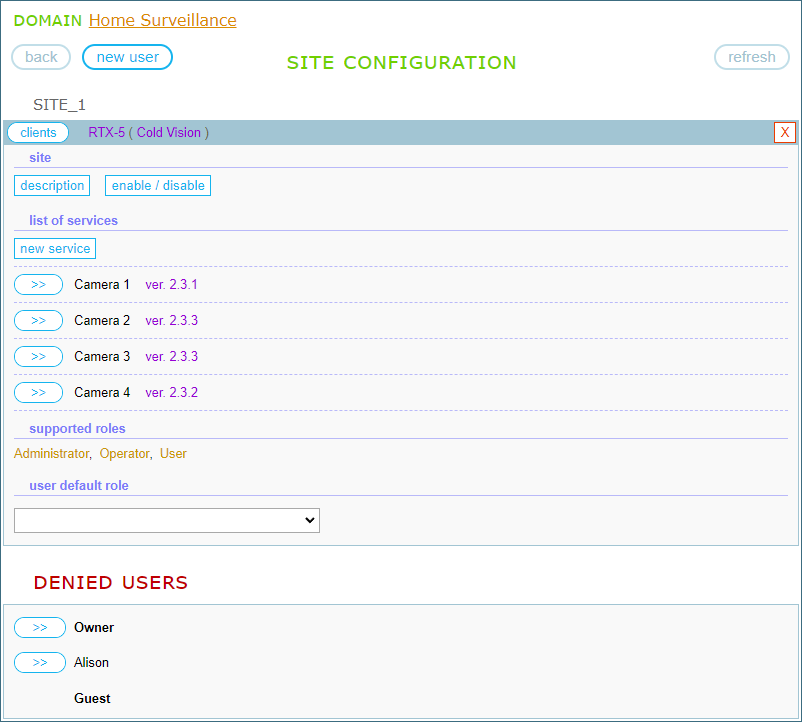
You can see that both users, Owner and Alison, are in the DENIED USERS section. We’ll now assign the Administrator role to Owner, and the User role to Alison.
Clicking the “>>” button, which is to the left of Owner, opens the editor for managing roles of Owner:
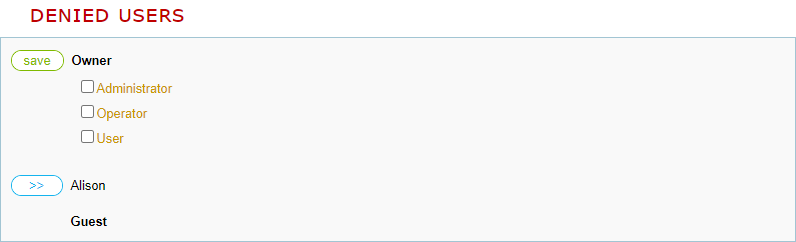
We check the Administrator role and click “save”. This results in Owner being moved from the DENIED USERS section to the site:
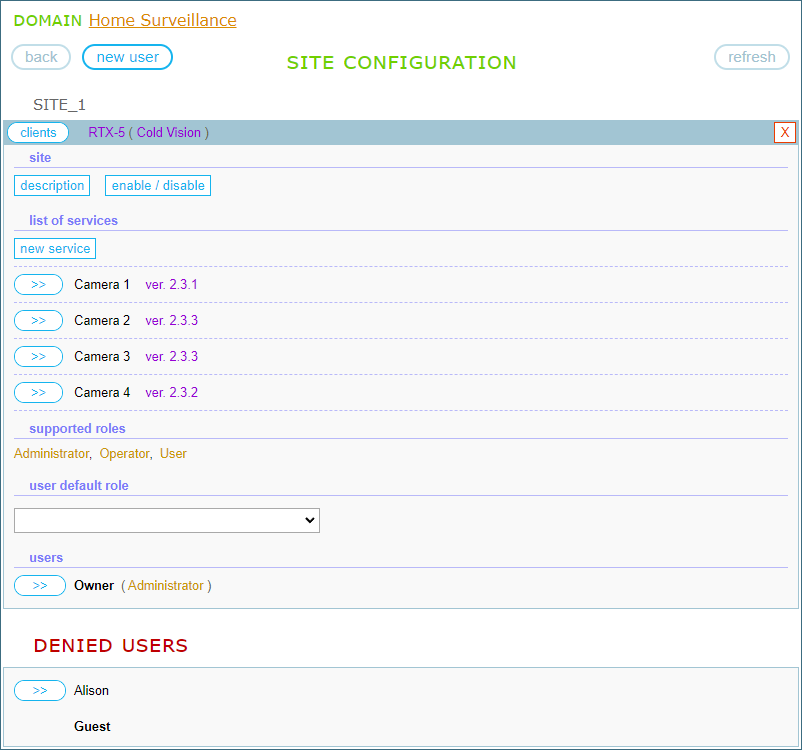
Next, clicking the “>>” button for Alison opens the editor for managing roles of this user:
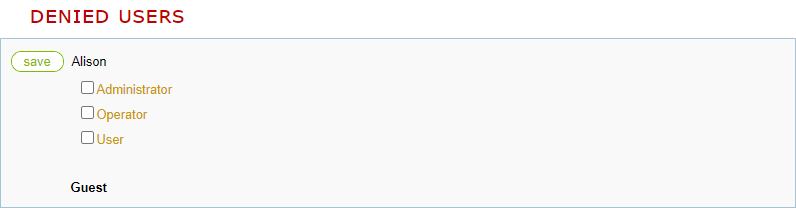
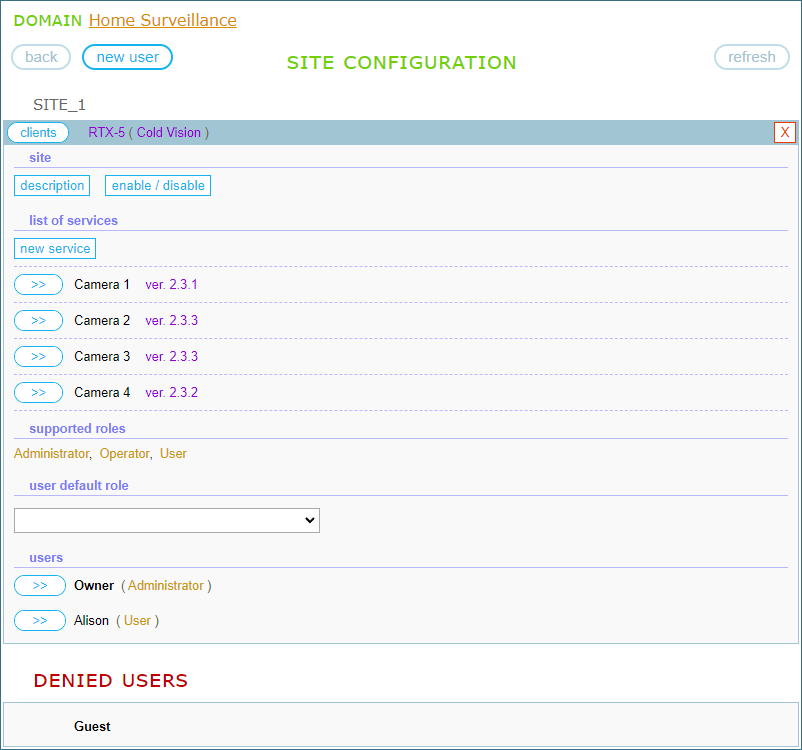
We check the User role and click “save”. This results in Alison being moved from the DENIED USERS section to the site:
Now, we are ready to set up clients on the site. This is a topic of the next section
TABLE OF CONTENTS
- 3.1. Creating a domain
- 3.2. Creating a multi-service site
- 3.3. Setting up devices
- 3.4. Assigning access rights to users
- 3.5. Setting up clients