3.3. Setting up devices on a multi-service site
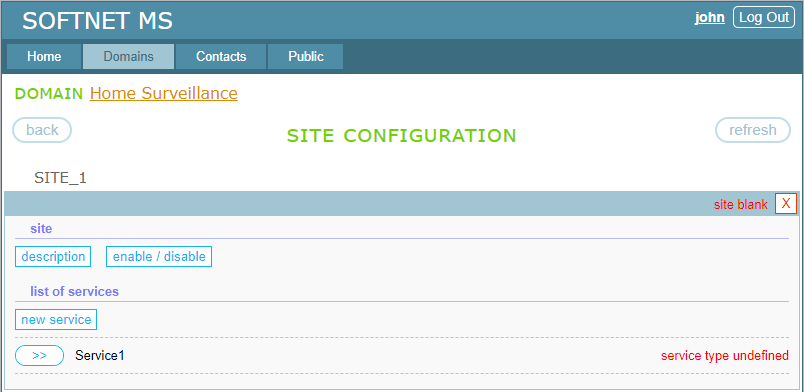
At this moment, our multi-service site contains nothing but one blank service entity with status “service type undefined”. And the site status is “site blank”:
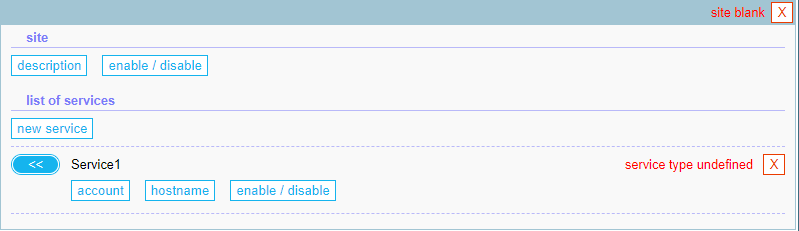
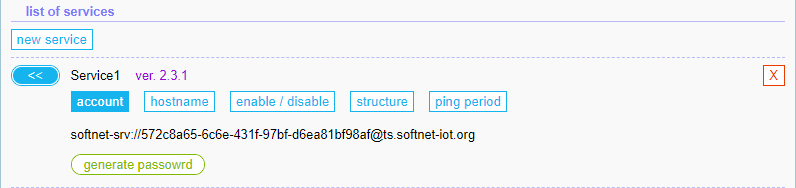
We set up the first IP camera to “Service1” entity. Clicking the “>>” button, which is to the left of “Service1”, opens the service management panel:
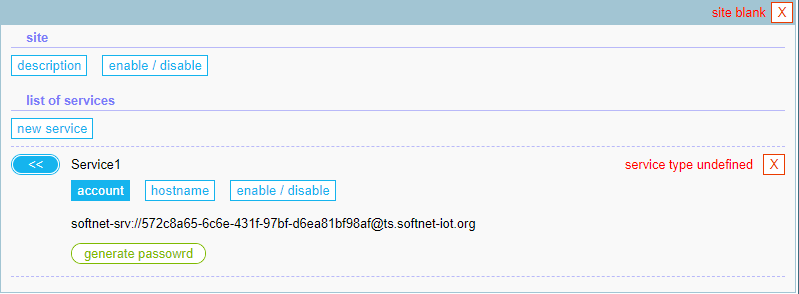
Clicking the “account” button shows the service URI and a button to generate a password:
Clicking the “generate password” button generates a password:
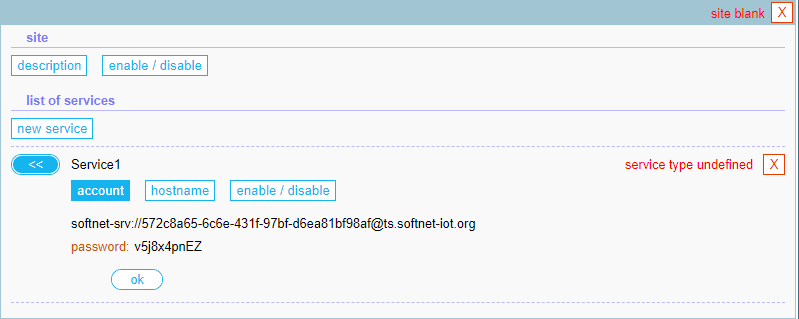
We have the following service URI and password that we can use to connect an IP camera:
softnet-srv://572c8a65-6c6e-431f-97bf-d6ea81bf98af@ts.softnet-iot.org
password: v5j8x4pnEZ
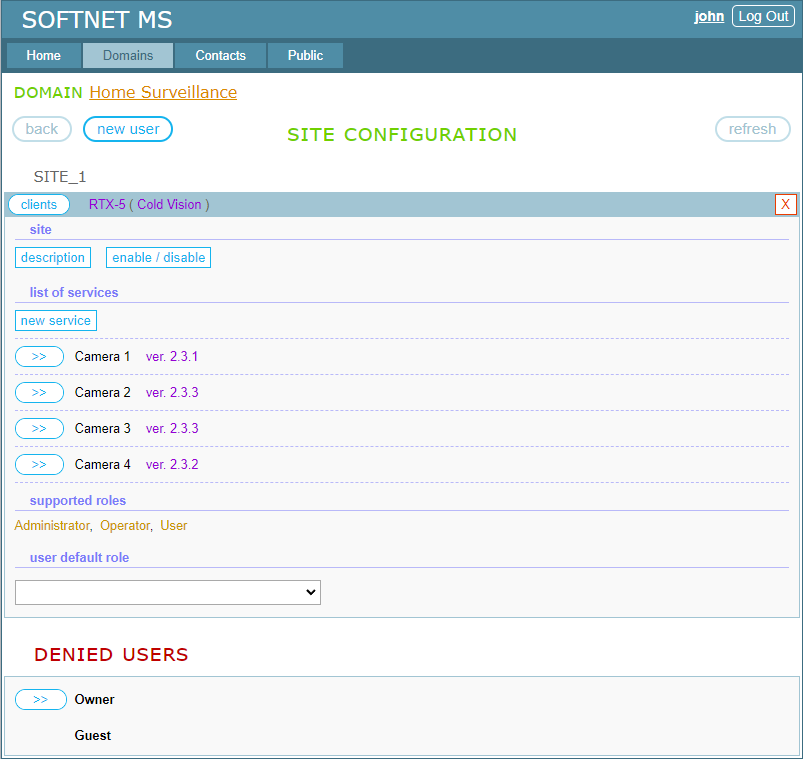
When the camera first connects to the site, it provides the required information to the Softnet server to build the structure of the site. The following is our constructed multi-service site:
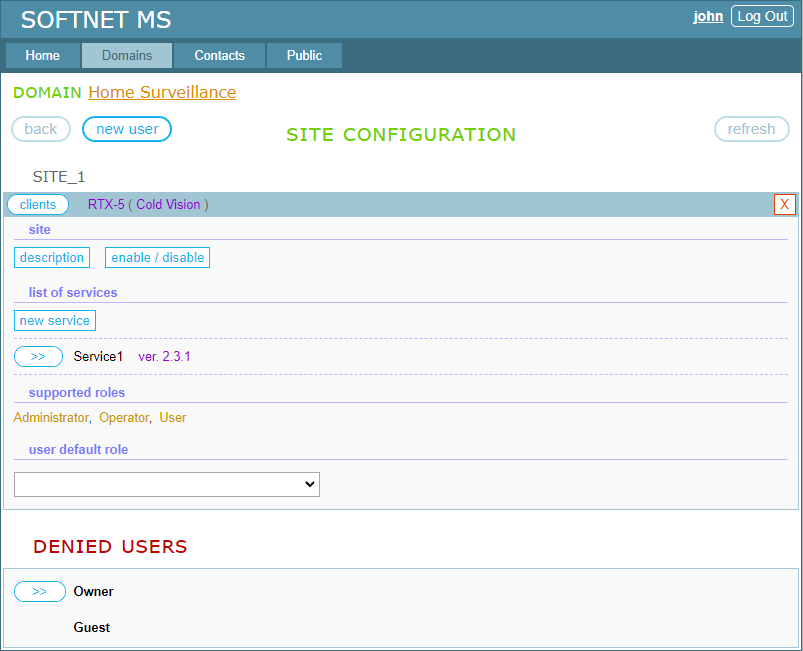
Let’s take a look at 5 parameters circled in the following image:
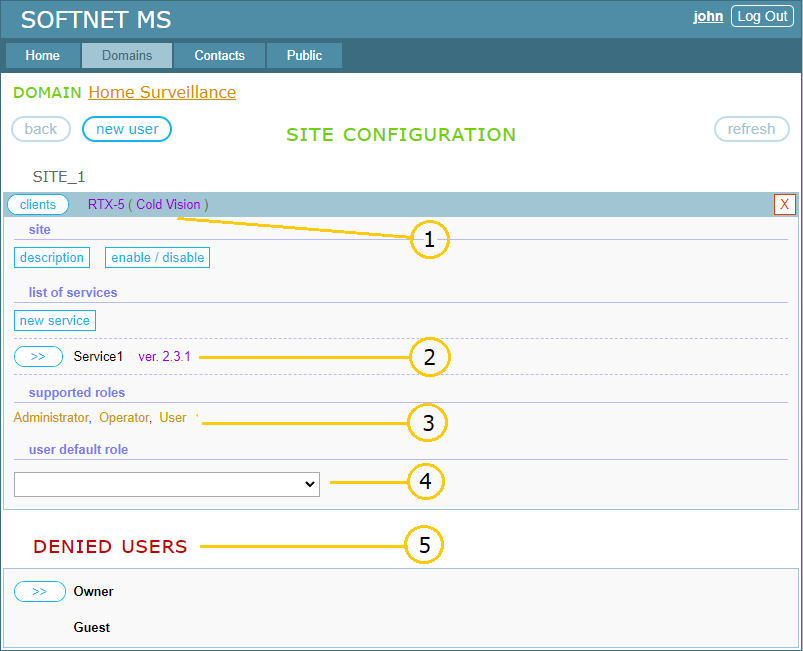
- These are the names of <Service Type> and <Contract Author> provided by the IP camera to the blank site. They indicate the service interface, that is, the device’s functionality. Clients that we are going to set up on the site must be designed to consume the service of this type, i.e., RTX-5 (Cold Vision);
- If your service application employs versioning, the service version will appear in this place;
- If your service application employs role-based access control (RBAC), the list of roles will appear in this place. You can assign these roles to domain users;
- Here you can select one of the roles listed above as the default role for every domain user. This is useful if you have many users and want to assign to all of them one specific role by default rather than explicitly assigning that role to each user;
- Users that do not have any access rights to the service are listed in the DENIED USERS section.
Let’s change the default service’s hostname, “Service1”, to “Camera 1”. Clicking the “>>” button, which is to the left of the name “Service1”, opens the service management panel:
Clicking the “hostname” button opens the hostname editor:

We enter the name “Camera 1” to the text field and click the “save” button. Then we have the following view of the IP camera entity. It is displayed as a combination of the device’s name “Camera 1” and software version “2.3.1”:

So far we set up only one device. To set up the next one, we create a new service entity. Clicking the “new service” button displays a textbox for entering the hostname for a new service:

We enter the name “Camera 2” and click the “add service” button:

Now we have a blank service entity named “Camera 2”:

Clicking the “>>” button opens the service management panel:
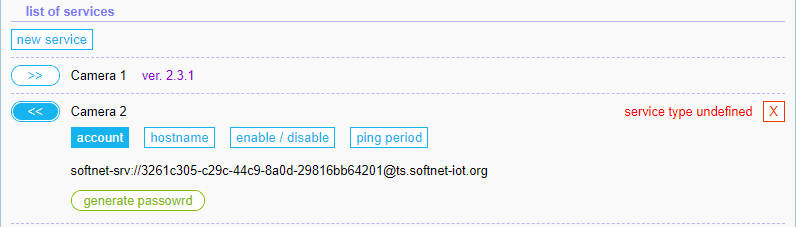
Further, we repeat the steps made for the “Camera 1”:
- generate a password by clicking the “generate password” button;
- provide the service URI and password to the next IP camera and connect it to the site.
As a result, we have the following:

To set up the next device, we create a new service entity and repeat all those steps we made for the second device. Continuing in this way, we can set up multiple identical devices on the site. The image below shows four IP cameras set up on the site:
In the next section we’ll assign access rights to users.