2.2. Setting up a device
To set up a Smart Home controller, we create a site. The controller will be represented on the site as a service. Clicking the “new site” button takes us to the “New Site” page:
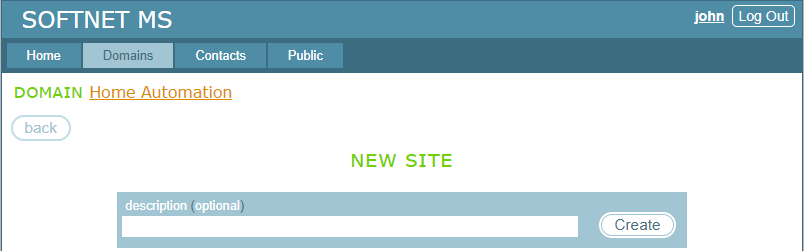
We leave the “description” field empty and click “Create”. This creates a site and takes us to the SITE CONFIGURATION panel:
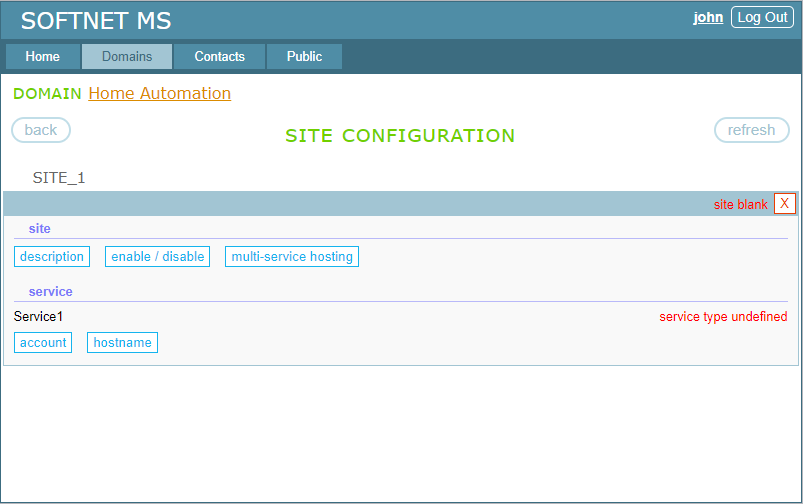
The newly created site contains nothing but one blank service entity with status “service type undefined”. The site itself has a status “site blank”. We can set up on the site one service application. It can be an autonomous device or PC application that employs the Softnet platform. The site we have created is called a single-service site. Deploying multiple identical devices on the site is discussed in the next chapter.
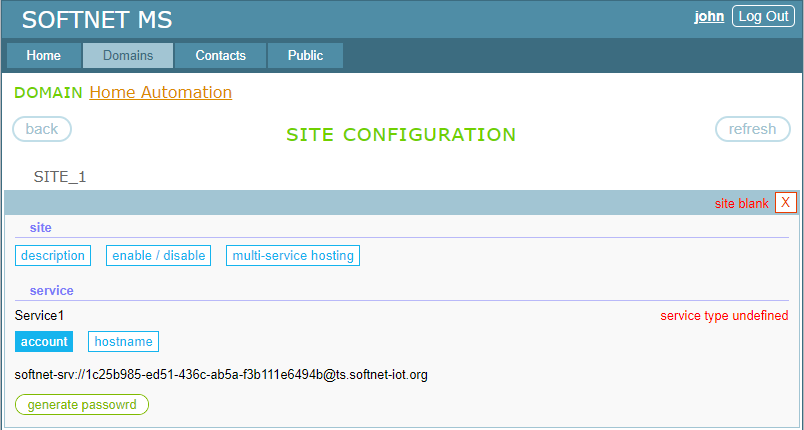
The images below demonstrate setting up a Smart Home controller on the site. Clicking the “account” button displays the service URI and a button to generate a password:
Clicking the “generate password” button creates a password:
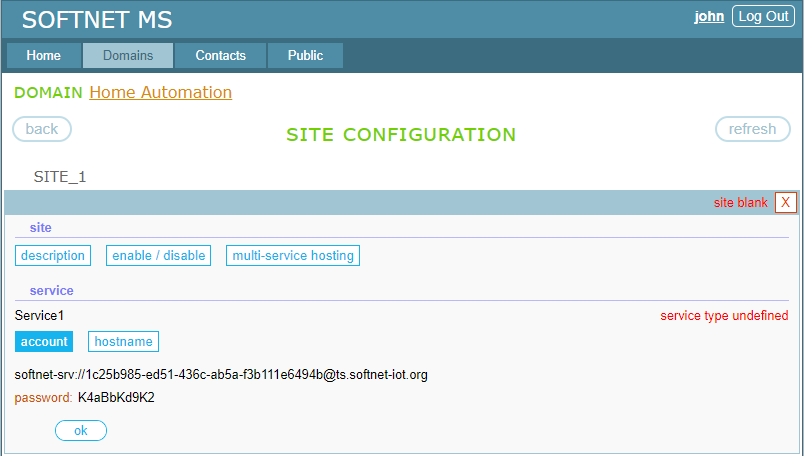
Now we have the service URI and password:
softnet-srv://1c25b985-ed51-436c-ab5a-f3b111e6494b@ts.softnet-iot.org
password: K4aBbKd9K2
For your device, the service account data will have a similar format. Enter them into your device and connect it to the site. When a device connects to the site for the first time, the site structure is built according to the information provided by the device. On the site, the device will be represented as a service. For our example, we have the following:
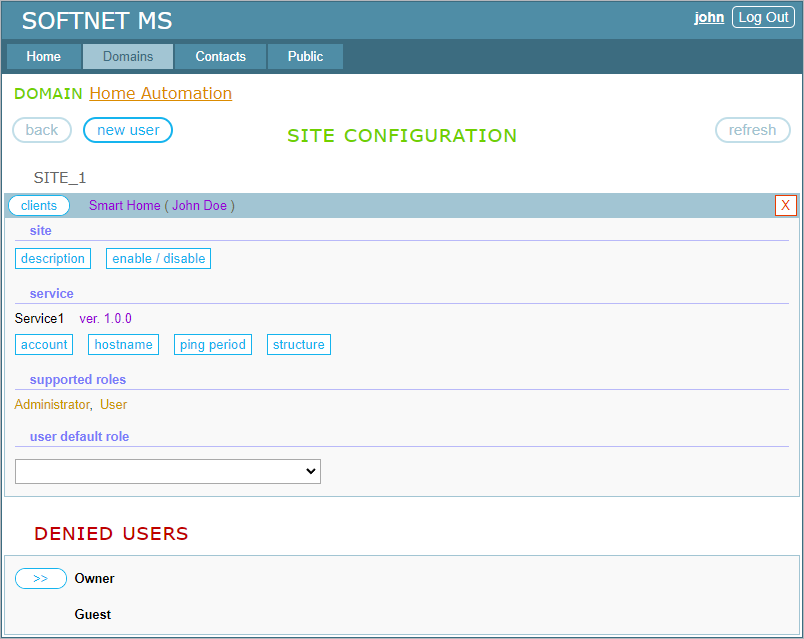
Let’s take a look at 5 parameters circled in the following image:
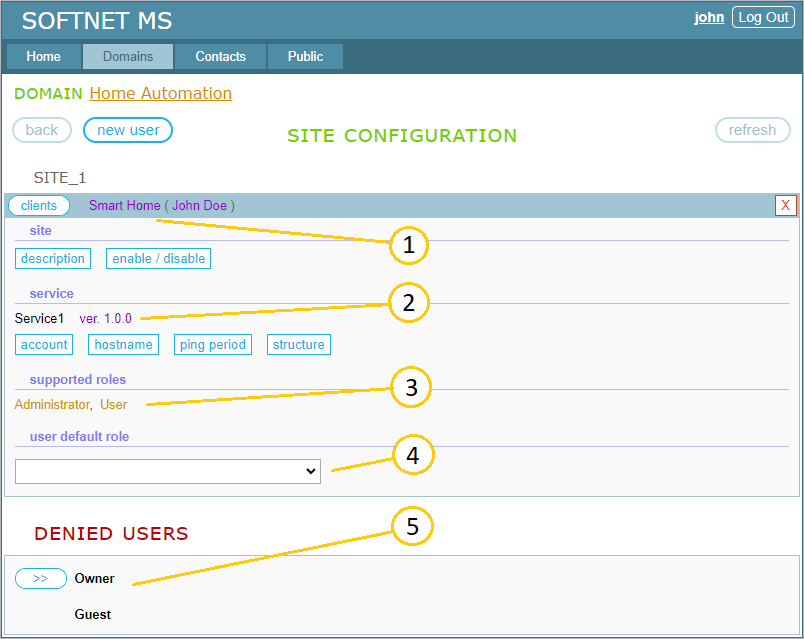
- These are the names of <Service Type> and <Contract Author> provided by the Smart Home controller to the blank site. They indicate the service interface, that is, the device’s functionality. Clients that we are going to set up on the site must be designed to consume the service of this type, i.e., Smart Home (John Doe);
- If your service application employs versioning, the service version will appear in this place;
- If your service application employs role-based access control (RBAC), the list of roles will appear in this place. You can assign these roles to domain users;
- Here you can select one of the roles listed above as the default role for every domain user. This is useful if you have many users and want to assign to all of them one specific role by default rather than explicitly assigning that role to each user;
- Users that do not have any access rights to the service are listed in the DENIED USERS section.
In the next section we’ll assign access rights to users.
TABLE OF CONTENTS
- 2.1. Creating a domain
- 2.2. Setting up a device
- 2.3. Assigning access rights to users
- 2.4. Setting up clients